I hope you're having a great Monday and a fabulous start to your week. Not so great here, it's rainy, very miserable and oh my has the cold arrived! The past two nights the temperature in Scotland has dipped to zero degrees (Celsius) brrrrr!
So, today I thought I'd continue my little blogging 101. I'm on a quest to create my own blogging notebook. A manual if you will, for me to refer back to if I ever need to. It would be wonderful if you'd keep me company :) Last time we added Blogger's own share buttons and today I thought I'd share how to add a favicon.
What I hear you ask is a favicon and why ever would I need one? Same questions I originally asked myself when trying to familiarize myself with the layout of my blog. A favicon is a tiny image or icon which sits on the far left hand side of the address bar. This image/icon will be associated with it's particular site and will also appear next to the site name in, among other places, a visitor's list of bookmarks.
If you look up at the address bar of this page you'll see my own little favicon, it still makes me smile :) As to why you'd want a favicon? Well, it replaces the Blogger favicon or icon in the address bar and helps to personalise your blog. Replacing Google's Blogger favicon with your own is so ridiculously easy it will practically replace itself honeys. Shall we begin?
First thing you will need is an image or graphic to set as your favicon. Remember this image will represent your blog, not only on the address bar of your own pages but also elsewhere, such as when your page is bookmarked or saved to someone's favourites, so it's worth putting a little thought into it's appearance.
Your image or graphic should be square and less than 100kb in size. I used pic monkey, which you can find here, to make mine so I'll show you how I made mine using that but do use whichever program you're most comfortable with honeys.
From the home page at Pic Monkey, when you run your cursor over "design" the following options will appear. You can choose the square option by clicking on it.
This will open the following page........
If you'd like to design your favicon you can do that on this page by changing the colour of your canvas or by adding overlays (there are lots of them to choose from.) I decided to import my own image and intended only to size it, so I pressed cancel on the canvas colour and then clicked on "open" on the bar above the canvas. This will open a pop up allowing you to locate the image you want to work with.
Once the image appears the screen will look like this......
As you can see honeys, from here you can crop your image, edit the exposure and sharpness of it etc. I clicked on resize and choose 250 x 250 as my image size. The size of your image or graphic isn't as important as it's final file size though, which Blogger requires to be less than 100kb.
When saving your final creation in Pic Monkey remember to add .jpg after the file name or the program will display quite a cheeky message :) Save your image to somewhere you'll remember and now we're ready to have some fun.
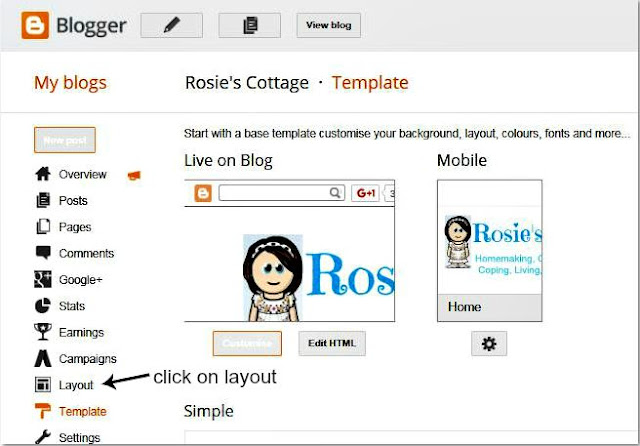
This takes you to the template page of Blogger and from the options listed down the left hand side of the page we choose "layout."
Clicking on layout will open your blogs layout page. As you can see the option we'll be working with is the very top "box." From here we click on edit.
Clicking the edit option will cause a little pop up box to appear. This pop up box looks like this....
If you click on the browse button you'll be able to locate your image or graphic you made earlier and upload it. Once done, click on the save button and close the pop up box.
On the top right hand corner of the layout page you'll see the save arrangement button....
Click on the save arrangement button and you're all done! You should now have a lovely favicon which will show on the address bar of your blog and will identify the pages are yours. How easy was that honeys?
I hope you had fun and you're now smiling at your favicon, I still smile whenever I see mine :) Till next time dear ones, keep smiling and stay warm, it's getting chilly. Hugs always xx


No comments:
Post a Comment