Hi Honeys,
I hope you're well and having a great weekend. I'm sorry I haven't posted in a while. OK, short Rosie moan coming up, please feel free to jump ahead😊 It's now 131 days lock-down began, many people are (carefully) out and about already but I haven't been any further outside than a few (very rare) trips to the end of our little patio in the back garden to feed the birds.
I haven't been able to have my bloods done (long story) and so I haven't had access to my arthritis medication since March. Spoonies will understand that when I say ouchie, it's a wee bit of an understatement. I'm coping as best as I can, just as we all are. Things will get better dear ones, we have to believe that, they always do. All we can do is hold on until they do <hugs> xx
Enough of my moans and on to what I hope is a useful, and fun, little sewing project 😊
This is going to be quite a long post, I took photos when making this cool (Hubby says so lol) wee mask, so why not go grab a cuppa and maybe a cookie or two and I'll meet you after the page break? (just click the "read more" link)
Welcome back honeys 😊 Do you have your cuppa and cookies? Me too ☕🍪 Make yourself comfy then dear ones and I'll share all 😊
Hubby & The "Cool Wee Mask"
I'm married to a lovely man honeys, he's my best friend, so keeping him safe is important to me. Hubby is also a "key worker" which means his occupation is within a group considered to be essential during the lock down. Thanks to technology, and the ability to conference call, he's been able to work from home some days while commuting to the office when needed each week too.
When I decided to try to make him a mask, he actually already had a re-usable mask he'd been using. It was a mask he'd taken out of his tool kit, it's meant to protect against dust etc when carrying out home projects. Well, he'd been wearing this on his commute to and from work but one of his complaints was how uncomfortable it was to wear due to it making his face feel "clammy" (ewww!) and that his glasses kept misting over too.
Making plans...
I haven't done any real sewing in a while honeys, but there was a time I used to make all kinds of things for around our home including our curtains with matching pelmets, do people still do pelmets? I'm being all 80s/90s aren't I? 😊
Well, having resolved to at least try to make Hubby's commute to work a little more comfortable for him, I sat down with a pen and some paper and, with Hubby's help, tried to plan out what might make a perfect mask (for him anyway😍)
I thought the problem of moisture building up on his skin, due to breathing inside the mask, might be made a little more bearable if I used an absorbent fabric for the lining to help draw the moisture away instead of leaving it to build up on his skin (again ewww!) I wasn't sure what to do about the glasses issue yet, but one thing at a time 😊
Gathering materials and a little up-cycling...
Off I went upstairs and rummaged through my stash of assorted bits and pieces of fabric. I did find a little jersey knit fabric and thought that might do for the lining, I put it to one side and carried on looking for a suitable outer fabric for Hubby's mask.
While continuing to rummage, I spotted a couple of pairs of jeans I had washed and kept in the hope I could make something with the denim. I'm all about up-cycling honeys 😄 Hmmm... what would denim look like as the outer fabric on Hubby's mask, I wondered? I headed downstairs and deposited my finds in the living room feeling quite chuffed with myself. 😊
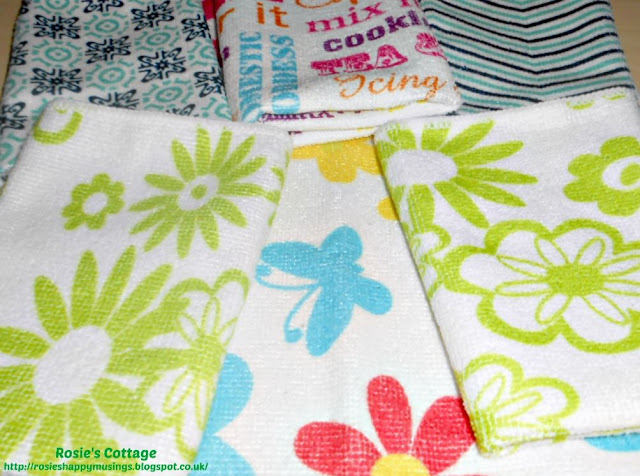
Having headed into the kitchen though, I had an "aha!" moment when I spotted my assortment of micro fibre squares, all folded neatly in their basket. I still had a new, unopened pack of these wonderful, and very absorbent, little squares and.... there it was, my aha! moment 😊
Materials found, now for a plan...
Having settled on the materials for the inside and the outside of a more user-friendly mask for Hubby, I needed some inspiration on how exactly to make it. As I said, the mask Hubby had been using was one he'd use while doing jobs around our home, such as cutting woods etc. It's one of those safety masks men keep in their tool kits?
Problem was, it's a solid mask shape, not a fabric one, so I couldn't even replicate it down in parts to make a pattern, as I usually would when trying to make something.
So, just like I had a few weeks ago when trying to find out how to cut Hubby's hair (still really pleased with how that turned out honeys) off I went to Youtube.
There, I found a great tutorial by a lovely vlogger named Emma, and Emma had even solved the issue with his glasses misting over too! I'll add a link to Emma's video at the end of this post honeys, if you go watch Emma's video, please say hello to her, she seems really lovely and very friendly.
Hubby now has four of these masks, which he says are far more comfortable to wear. He said his face doesn't get all "clammy" wearing them (again, ewww!) and best of all, his glasses don't fog over! Yaaayy!
Let's Make Our Masks...
Materials Needed:
Fabric for outer and inner mask pieces
Needle & thread or sewing machine
28" (or 72cm) of elastic (this fit both me and Hubby honeys but you can always adjust it easily)
Template for mask pieces - you'll find the link under Emma's video which I'll add at the end of this post under links.
Directions:
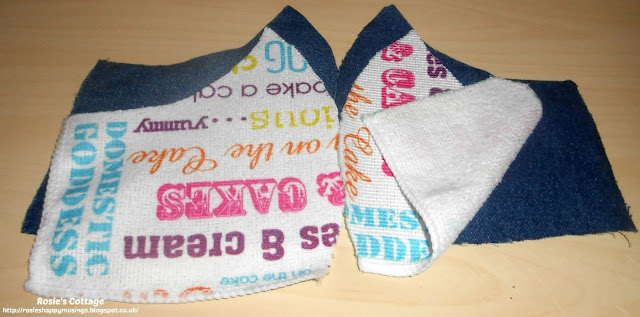
1. Using the template linked from Emma's video (thank you Emma x) I cut out two pieces of micro fibre and two pieces of denim from the recycled jeans...
2. Now that we have the pieces needed for our mask, we can start assembling it...
3. First is to place the pieces of micro fibre together, pinning them along the rounded edge, which will form the middle seam of the front of the mask.
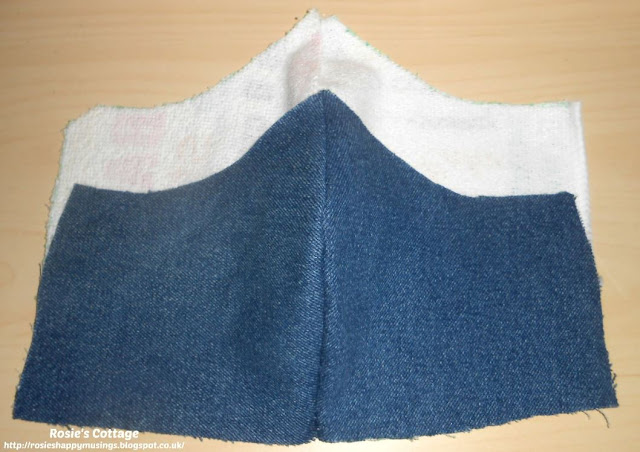
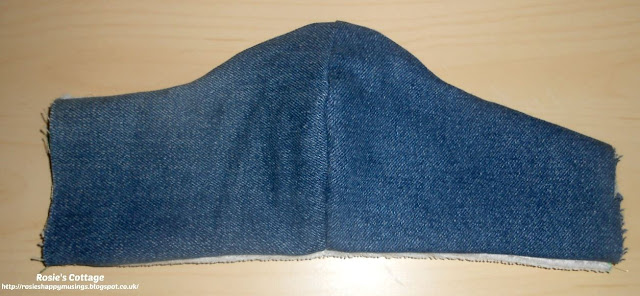
I sewed these edges together using my trusty Singer sewing machine and then did exactly the same thing with the two pieces of denim, sewing them together, just as I had with the micro fibre pieces, with the "right" sides (the sides we'll see when it's finished) facing each other.
4. When sewn, you'll have the inner and outer pieces of the mask, like this honeys...
5. Place the two pieces, inner and outer side, together, with their "right" sides facing each other, to the inside.
Pin them into place and then sew along the top edge, side to side. Then, sew again along the bottom edge...
Don't sew the side pieces together honeys, we need them to stay open right now.
6. To form a nose bridge to help the mask sit properly on the face and allow the users glasses to sit on top (this prevents the glasses from constantly fogging over) I used a pipe cleaner. Thanks Emma x
The pipe cleaner was from a pack in my crafts supplies, I think it was around £1 for a pack of 20 from The Works, but you can find these in pound/dollar stores too honeys.
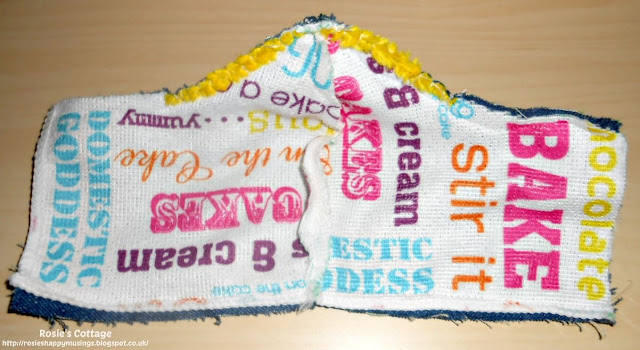
7. I folded the pipe cleaner in half and then sewed it by hand into the nose part of the mask. I wanted it to be securely sewn in place so that it didn't come loose in the washing machine since Hubby throws his gloves and mask into the wash as soon as he gets home...
8. Now we're ready to turn our mask right way out. To do this, gently push the mask through one of the un-sewn open sides. When the mask is facing right way out, I then moulded the pipe cleaner inside the mask into the right shape, making sure the pipe cleaner was sitting neatly at the top of the mask...
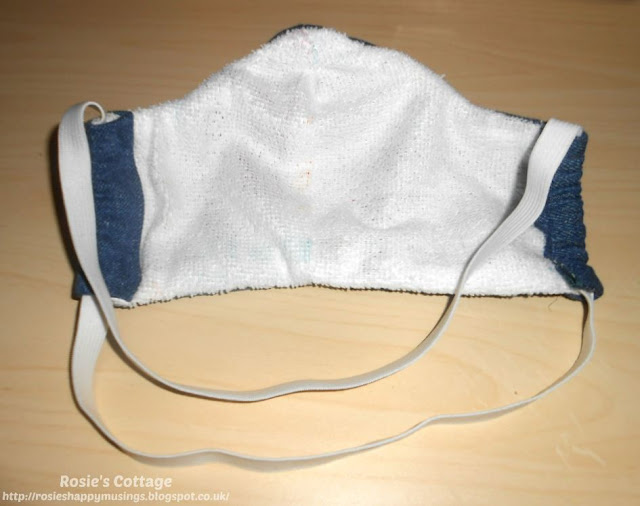
9. Now we (nearly) have a mask honeys. Inside, is the lovely soft micro fibre lining that is going to help avoid the mask becoming uncomfortable when worn...
10. Next, sew along both sides, allowing an open "channel" or space for the elastic to be threaded through...
11. Once done, the elastic is threaded through both sides, forming what will be two elastic pieces which will both go around the head. One piece sits over the ears and one will sit under,so one piece high on your head honey and one low.
I then sewed the two pieces of elastic together securely, then gently pulled the elastic through the sides until the sewn part is hidden inside one of the side pockets to make the finished mask neat and tidy...
12. All done! The proof, as the old saying goes honeys, is in the pudding and Hubby says it's a "cool wee mask." 😍 He said it's comfortable to wear, he can breathe easily in it and his glasses don't mist over. Success!
Links
Many, many thanks to lovely Emma for her wonderful video, which you can find here honeys.
The template used to cut out the mask pieces that Emma links to is here, at dropbox, just downlload the PDF, print it and use it to cut out your fabric. The template was created by Mimi G, thank you Mimi x You can find her video here.
There is a UK Gov Information Page on masks and protective equipment which you can find here This page is kept updated.
Remember:
Wash your hands honeys. I know it must be second nature by now but when you take off your mask, please remember it's been acting as a shield between you and all of the germs of the outside world, so when you take it off, you're touching all of those germs it's hopefully been helping you to avoid. So please honeys, wash your hands.
Hubby now has four of these masks. They live in a clip seal bag by the front door. Before he goes out, he takes a mask from the bag, re-seals the bag, and puts it on. When he gets back home again, his mask and gloves go into a hot (60c) wash and Hubby washes his hands. The mask is dried and placed back into it's bag again. His gloves are washed after each use too.
Nobody really knows what's happening with this virus, but we have to believe they'll find an answer and that everything will be ok. All we can do till then is to stay informed and do our best to stay safe, sending you heaps of hugs honeys, till next time, stay safe dear ones xx









No comments:
Post a Comment